
 568k
568k  233k
233k  41k
41k  Subscribe
 Why you can trust us
Founded in 2005 as an Ohio-based environmental newspaper, EcoWatch is a digital platform dedicated to publishing quality, science-based content on environmental issues, causes, and solutions.


This fizzy, fermented tea is great for gut health, but the single-use plastic and glass bottles it’s packaged in are bad news for the environment. Instead of shelling out four dollars for a single bottle of kombucha at the corner store, try making your own at home with a few simple ingredients.
What Is Kombucha?
Kombucha is a fermented drink made with bacteria, yeast, sugar and tea, and has a history dating back thousands of years to ancient China. Its natural carbonation is a result of live cultures that feed on sugar, causing a chemical reaction that produces carbon dioxide. Kombucha does contain alcohol, but usually no more than 1%, although people who avoid alcohol should be aware of its presence.
Besides its tangy flavor and effervescence, kombucha is drunk mainly for its purported health benefits. Like other fermented foods, it’s a good source of probiotics, and helps balance bacteria in the gut and improve indigestion. The tea in it contains antioxidants, and there’s even evidence to suggest it is beneficial to heart health and might help manage cholesterol.
Most importantly, kombucha is made with a SCOBY: sometimes called a SCOBY pellicle, or kombucha mother. This jelly-like disc is the side of kombucha-making that you don’t see in the uniform store-bought bottles, but it’s essential to the brewing process. SCOBY is an acronym for “symbiotic culture of bacteria and yeast,” which is exactly what it is. It forms when lactic acid bacteria, acetic acid bacteria, and yeast are fermented together, and it helps transform the sugar in the tea into acid, alcohol and carbon dioxide: essential components of kombucha. Basically, the SCOBY holds the bacteria and yeast that the kombucha needs, and also sits atop the liquid, sealing it off from the air and preventing harmful bacteria from entering the brewing vessel. Each time kombucha is successfully brewed, a new SCOBY will form, and you’ll need one to get started with your own brewing.

How to Make Your Own
Kombucha brewing might seem daunting, but the whole process only requires a few ingredients — and once you’ve made your first batch, it’s easy to keep the process going.
Ingredients and Supplies
The base of all kombucha is tea, sugar and water. Start with eight bags of black or green tea, one cup of granulated sugar, and eight cups of water. Herbal tea cannot be used to make kombucha, but you can use a mixture of black and green tea, or even Earl Grey. Master kombucha brewers all recommend varying levels of these ingredients, so experiment with what works for you. Keep in mind that the more sugar you use, the longer the fermentation will take, but you’ll end up with a fuller taste. Check out this chart for alternative ingredient quantities.
Additionally, you’ll need a SCOBY: the most fundamental ingredient of all probiotic-full kombucha. If you’re growing your own SCOBY, you’ll also need two cups of pre-made kombucha, or a small amount of vinegar. If you’re skipping the SCOBY-making process, you’ll need to obtain a fully-grown SCOBY from someone else (if not from a friend, then an online retailer or health food store is your best bet).
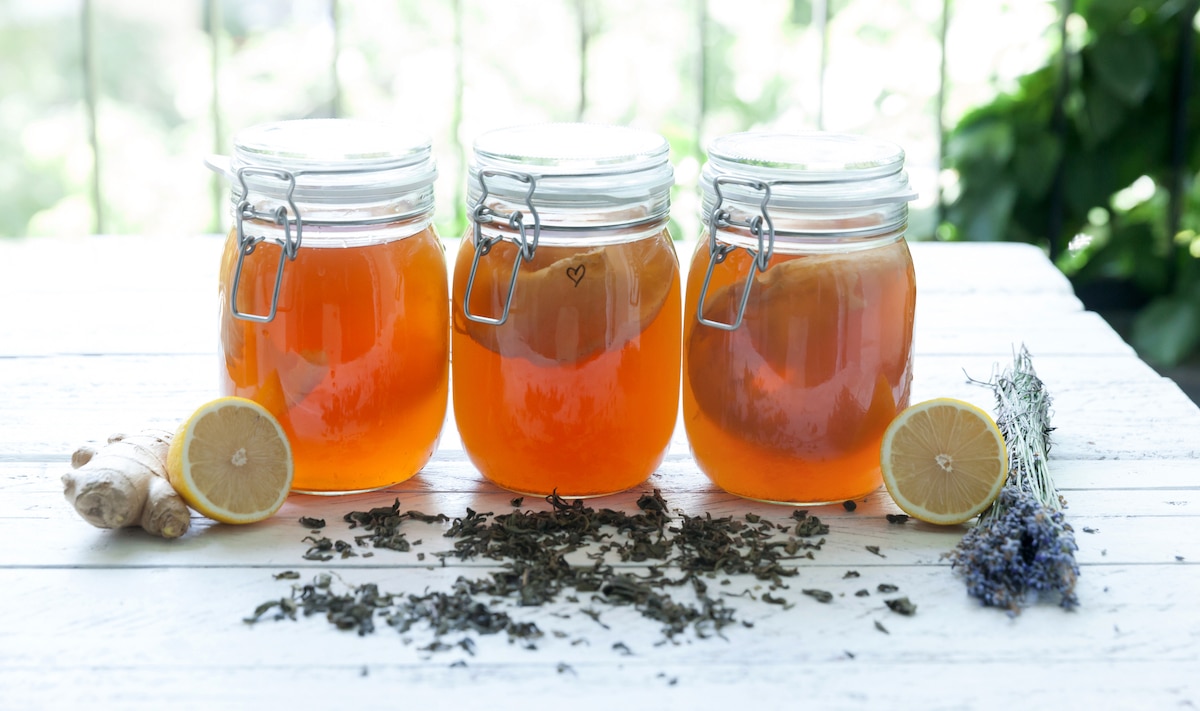
Lastly, you’ll need three large glass jars (ideally, one 2 to 3 gallon jar for brewing the tea, one 1 gallon for making the SCOBY, and one half- or quarter-gallon for the SCOBY hotel) with nonmetal lids, a few coffee filters or tea towels, a handful of rubber bands, a funnel and several small bottles to store the finished kombucha.
Growing a SCOBY
The most common SCOBY-growing method is using already-made kombucha as a starter — either a bottle of unflavored, store-bought kombucha, or a scoop of homemade from a friend.
In a pot or large pan, boil the water, then add the sugar and let it dissolve. Turn off the heat and add the tea bags to steep for about 20 minutes. Once the liquid comes down to room temperature (the tea needs to be completely cool, or the live cultures in the SCOBY might be killed by the heat), pour it into a clean, one-gallon jar and mix in one cup of the store-bought kombucha. Instead of putting the lid on, use a rubber band to secure a coffee filter or piece of woven fabric (like a tea towel) over the top to permit oxygen flow. Place the jar somewhere to rest; the SCOBY grows best in an environment that’s about 70 degrees Fahrenheit, but not in direct sunlight. In two to four weeks, you should see bubbles forming along with a jelly-like, off-white film about a quarter-inch thick on the surface of the liquid. That’s your SCOBY! The liquid underneath is also your “starter tea,” which you’ll use to brew your first batch of kombucha, along with the SCOBY.
If you want to really start from scratch, use vinegar instead of pre-made kombucha to start the SCOBY-making process. Bring the water to a boil, then dissolve the sugar and steep the tea the same way. Transfer the mixture to a one-gallon jar once it’s cooled, then add a tablespoon of apple cider vinegar or distilled white vinegar. Fill up the rest of the jar with cold filtered water, and let it ferment in the same way.
Brewing the Tea
Now it’s time to brew your first batch of tea using your new SCOBY. This step basically repeats the SCOBY-making process: start by brewing the tea the same way you did to make the SCOBY (minus the store-bought kombucha), and let it cool. You can use sweeteners other than sugar, but some are less consistent; refer to this chart for more information.
Find the biggest jar you have (two to three gallons is ideal) with a wide mouth, and sanitize it with vinegar and hot water (or with soap, as long as you rinse it thoroughly so it doesn’t interact with the SCOBY). Pour in the tea and add one or two more cups of cold filtered water. At this point, you can add one to two cups of the starter liquid from your SCOBY-making process, as well as the SCOBY itself. If you don’t have enough starter liquid, don’t worry: pre-made kombucha can make up the difference. This liquid is just meant to lower the pH of the tea, and should make up about 10%-ish of the new batch. It also protects the tea from microorganisms that might harm it.
Now it’s time to wait. Don’t worry if the SCOBY floats around the bottle, or if you notice sediment and stringy bits floating beneath it; these are healthy signs of fermentation. You’ll also notice a second SCOBY forming underneath the first; each batch creates a new one. In one to four weeks, it should be ready to drink. Using a straw, take a sip (taking care not to damage the SCOBY) to see if the flavor is what you’re looking for. If you want a tarter, more vinegary taste, let it ferment for a little longer. After brewing enough batches, you’ll know how many days your ideal kombucha takes to brew.
Storing the Finished Kombucha
Once it’s done brewing, store the finished kombucha in smaller bottles. This step is essential for creating carbonation. Funnel in the liquid, leaving an inch or so at the top for the newly-formed bubbles. Be sure to avoid jars or bottles with metal caps, which could react with the kombucha. It’ll enter a sort of second fermentation in these bottles, becoming more bubbly the longer they sit out. If you’re using plastic bottles, you can feel how much fizz has formed by how solid the bottles become. After about three days (or less), they’ll be plenty fizzy, and you can move them to the fridge.
Optional: Flavoring Kombucha
Fresh kombucha is delicious on its own, but adding flavors is a fun way to spice it up. Try not to get too crazy with the fruity flavors, as they might aid fermentation too much and build up to an explosion in your fridge.
When pouring your finished kombucha into individual storage bottles, put the flavorings on the bottom of the bottles and pour the liquid right over, then strain it out when you’re ready to drink. Here are a few flavoring ideas to get you started:
- Ginger: a few matchstick-sized slices
- Dried herbs: about one teaspoon of dried lavender, lemon balm, or mint.
- Fruit: dried cranberries or figs, berries, and stone fruit like peaches and cherries.
- Floral combinations: a few dried hibiscus flowers or rose petals.
- Citrus: a few teaspoons of fresh juice or zest from oranges, grapefruits, or lemons.
- Hot spices: cayenne and jalenpeño to add a kick.
Making a SCOBY Hotel
After your SCOBY has done its job, its life isn’t over. Build a “SCOBY hotel” where the SCOBYs formed with every batch can rest until they’re needed. Move the SCOBY to another clean jar with about two cups of the freshly brewed kombucha (which will act as your starter liquid for your next batch, too), and cover with a filter or tea towel the same way you did for the kombucha. Continue to add SCOBYs as they grow on top of your batches, adding liquid along the way. Keep in the fridge if you’re not actively using the SCOBYs.
Tips for Brewing Safely
- Use organic, high-quality ingredients if you can.
- Keep everything extremely clean, including the jars, lids and tea towels.
- Pay attention to the SCOBY. If it grows mold or starts to smell bad, it might not be functioning correctly and preventing toxins from entering. However, there will be some discoloration on a healthy SCOBY; learn to distinguish the natural dark spots (which are just dying yeast cultures, and are nothing to worry about) from actual mold, which will look more like the mold you see on things going bad in the fridge: fuzzy and blue-greenish. If you notice the latter kind, you’ll unfortunately need to ditch the compromised SCOBY and start again.
- Make sure you’re using a tightly woven fabric to cover the jar — not cheesecloth. Otherwise, fruit flies or other insects might be able to get into the jar and contaminate the SCOBY.
- Learn how to say goodbye to your SCOBY. Although they can last for a very long time with proper care, all SCOBYs will reach the end of their life at some point. If it becomes black (or starts developing mold), it’s time to say goodbye.
Subscribe to get exclusive updates in our daily newsletter!
By signing up, you agree to the Terms of Use and Privacy Policy & to receive electronic communications from EcoWatch Media Group, which may include marketing promotions, advertisements and sponsored content.