Best Window Insulation Kits to Lower Your Energy Bills (2024 Guide)
In this article, we’ll discuss:
- How to lower your energy bill with a DIY window insulation kit
- The benefits and drawbacks of window insulation kits
- Our top picks and recommendations for window insulation kits
- How to install your insulation film for effective weatherproofing
Each product and or company featured here has been independently selected by the writer. You can learn more about our review methodology here. If you make a purchase using the links included, we may earn commission.
If your energy bills are high, your windows may be to blame. According to the U.S. Department of Energy, an estimated 30% of energy in homes is lost through windows.1 Inefficient windows let in cold drafts during the winter months and can let your cooled air escape in the summer, leading to high heating costs and cooling costs. The older your house is, the more likely you are to be experiencing energy loss through your windows.
If you are still on the fence about springing for new, energy-efficient windows, the simple, seasonal solution is to install a window insulation kit. In this article, we’ll go over the basics of DIY window insulating and share our top picks for window insulation kits.
If you’re looking to replace your drafty, inefficient windows and reduce your energy costs year round, get connected with one of our trusted providers to get a quote for energy-efficient windows.
What Are Window Insulation Kits?
A window insulation kit is a simple, DIY window treatment that minimizes heating and air conditioning being wasted through your windows. If your windows are old or damaged, you could save a significant amount on your energy bills by installing window insulation kits on drafty windows.
A window insulation kit contains plastic insulation film that you shrink wrap to your windows. Window insulation kits are one of the fastest and cheapest ways to prevent energy loss, as they temporarily seal windows.
Window insulation kits are ideal for renters looking for a seasonal solution to inefficient windows. For homeowners who need a long-lasting way to significantly improve the energy efficiency of their homes, we recommend installing energy-efficient windows.

Renewal by Andersen

Save $375 Off Each Window
Average cost
Pros
- Great industry reputation
- Award-winning company
- Member of US Green Building Council
- Manufactures products in-house
Cons
- No lifetime warranty
- More expensive than competition

Window World

200 Locations Nationwide
Average cost
Pros
- EnergyStar Partner
- Large service area
- Wide variety of products and services
- Great industry reputation
- Lifetime warranty
Cons
- Quality of service will depend on your area

Window Nation

9 States (75 miles from showrooms)
Average cost
Pros
- Award-winning company
- Wide variety of products and services
- Manufactures products in-house
- Custom Designs
Cons
- Installation not covered by warranty
- Limited service area
Should You Buy a Window Insulation Kit?
Window insulation kits are a quick and easy way to prevent energy loss. Although they are not a permanent solution, they can still help reduce your energy bill and boost your home’s efficiency.
Benefits of Window Insulation Kits
- Easy: Installing window insulation kits takes less than a day, and there’s no need to hire professional help.
- Cheap: You can buy a pack of three from your local hardware store for about $10. Keep reading below to check out our recommendations.
Downsides of Window Insulation Kits
- Temporary: You cannot usually open windows that have been treated with window insulation film. If you have cold air coming in through your windows in the winter and warm air in the summer, it may be time to invest in a long-term window solution rather than a seasonal one.
- Time-consuming: In order to maximize your energy savings, you must wrap all of your drafty windows. Depending on how many windows you have, this can be quite a time-consuming project.
Best Window Insulation Kits: Our Top Picks
Explore our window insulation kit recommendations and see which kit best fits your needs.
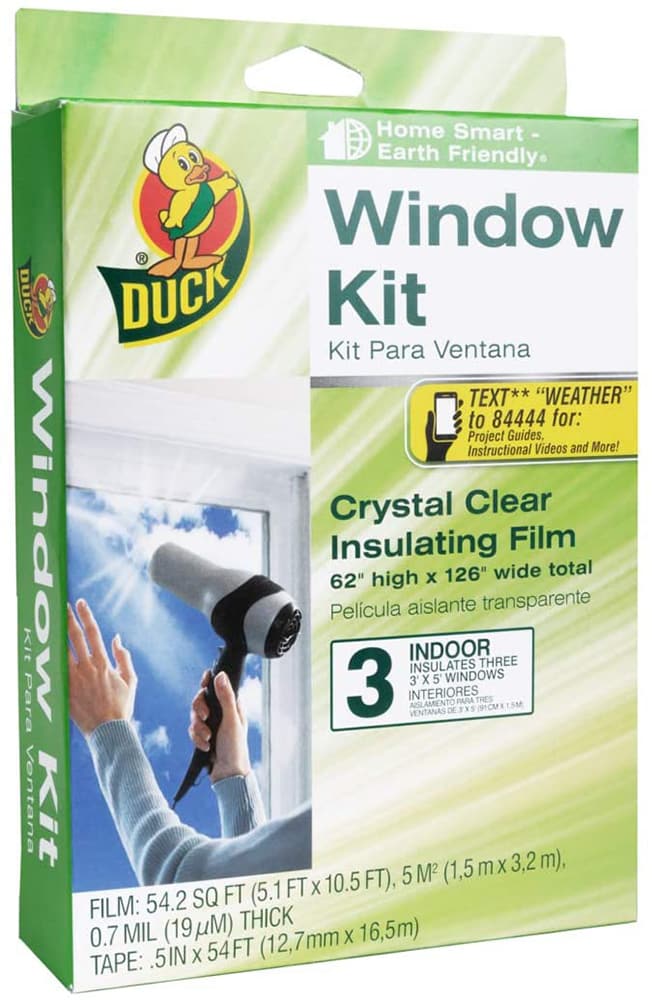
Best Value: Duck Brand Indoor Window Insulator Kit
The Duck Brand insulator kit has almost 20,000 reviews on Amazon and is only $10. Some reviewers felt that the film was thinner and more difficult to work with than more expensive brands, so overall, this brand is a good value for standard-sized, indoor windows in low-traffic areas of your home. This kit comes with double-sided tape and enough film to cover three 3-foot by 5-foot windows.
What It Comes With:
- 62 x 126 inches of clear film
- 1/2-inch x 54-foot roll of double-sided tape
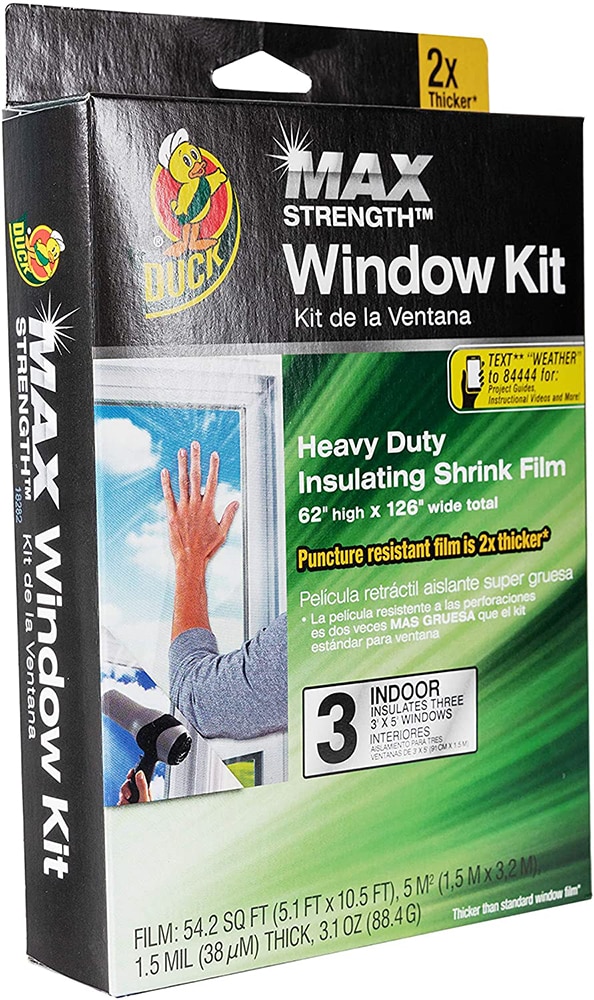
Best Heavy Duty Choice: Duck MAX Strength Heavy Duty Insulating Film
A durable film is favorable for creating a long-term, lasting seal. The Duck MAX Strength film is puncture-resistant and suitable for more high-traffic areas of your home. Although heavy-duty film is a little more expensive, this film is twice as thick as typical film and will certainly last longer. This kit also comes with double-sided tape and enough film to cover three 3-foot by 5-foot windows.
What It Comes With:
- 62 x 126 inches of heavy-duty film
- 1/2-inch x 54-foot roll of double-sided tape
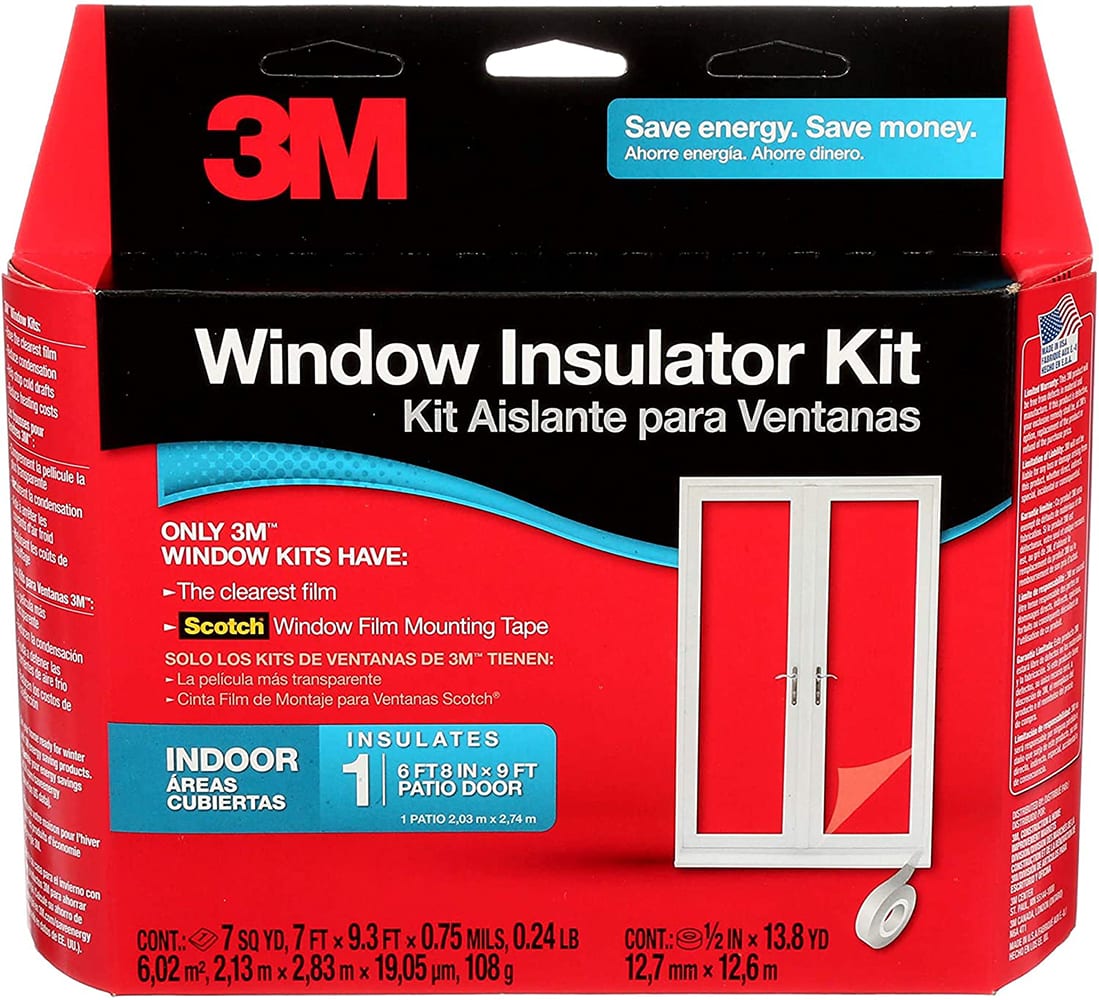
Best for Extra Large Windows or Patio Doors: 3M Indoor Patio Door Insulator
The 3M indoor shrink window kit for patio doors can also be used for large windows, and it comes with enough film to cover one patio door. Although this particular product is intended for indoor use, 3M also has an outdoor version.
What It Comes With:
- 84 x 112 inches of heavy-duty film
- 1/2-inch x 41-foot roll of double-sided tape
How to Install Window Film Insulation
It’s easy to install window insulation film. This heat-shrink film is placed over windows to block drafts from entering your home. Below are the general instructions for applying window insulation film, but make sure to follow the directions on your specific kit.
What You’ll Need
- Measuring tape
- Window insulation kit (with double-sided tape and film included)
- Box cutter or scissors
- Hairdryer
Directions
- Choose which kit is best for you. Window insulation kits should contain both plastic sheeting and double-sided sealing tape. The best window insulation kit for you depends on the size and type of window you are working with. If you are insulating patio doors or extra large windows, make sure to get a kit with enough sheeting.
- Measure and prepare your windows. Clean the glass and frames of the windows you want to insulate. Make sure that everything is completely dry before you begin the application process. Measure your windows with a measuring tape. You may have to cut your film to size.
- Apply double-sided tape to the window frame. The double-sided tape should go in front of the molding. Cut each piece of tape to size, place it, and apply pressure so that it stays in place. It is best to remove the backing as you apply the plastic about six inches at a time.
- Attach the film, working from top to bottom. Because the film is thin, remove and unfold it slowly. It is best to unfold the film as you go, rather than all at once. Start by unfolding about a foot of the plastic along the entire width of the window. Stick this to the top of the tape and work down, unfolding the plastic as you get nearer to the bottom.
- Trim the excess. Use scissors or a box cutter to remove excess film around the sides of the window.
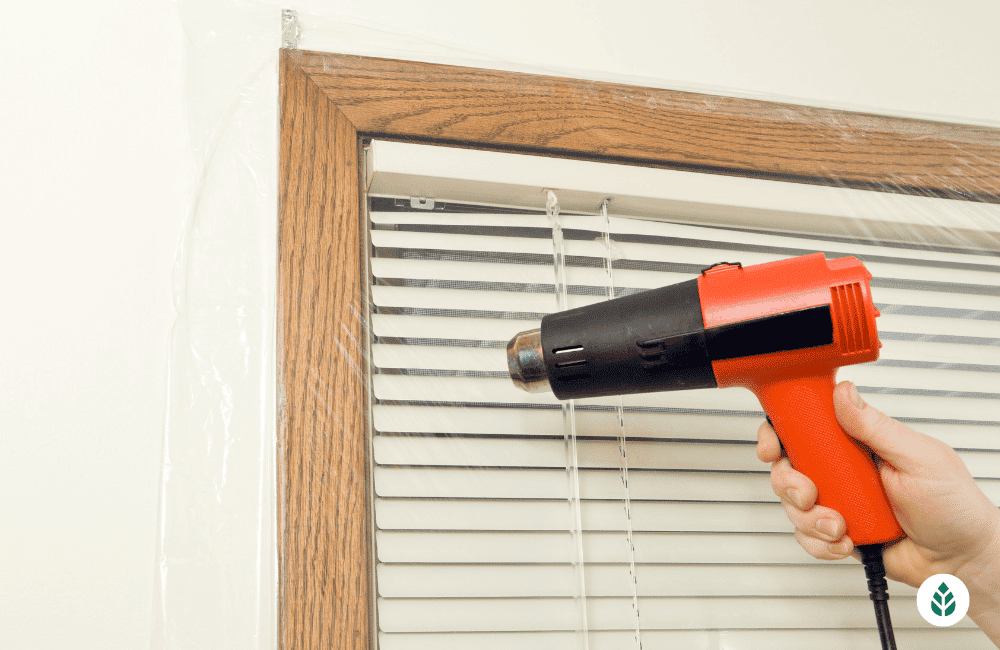
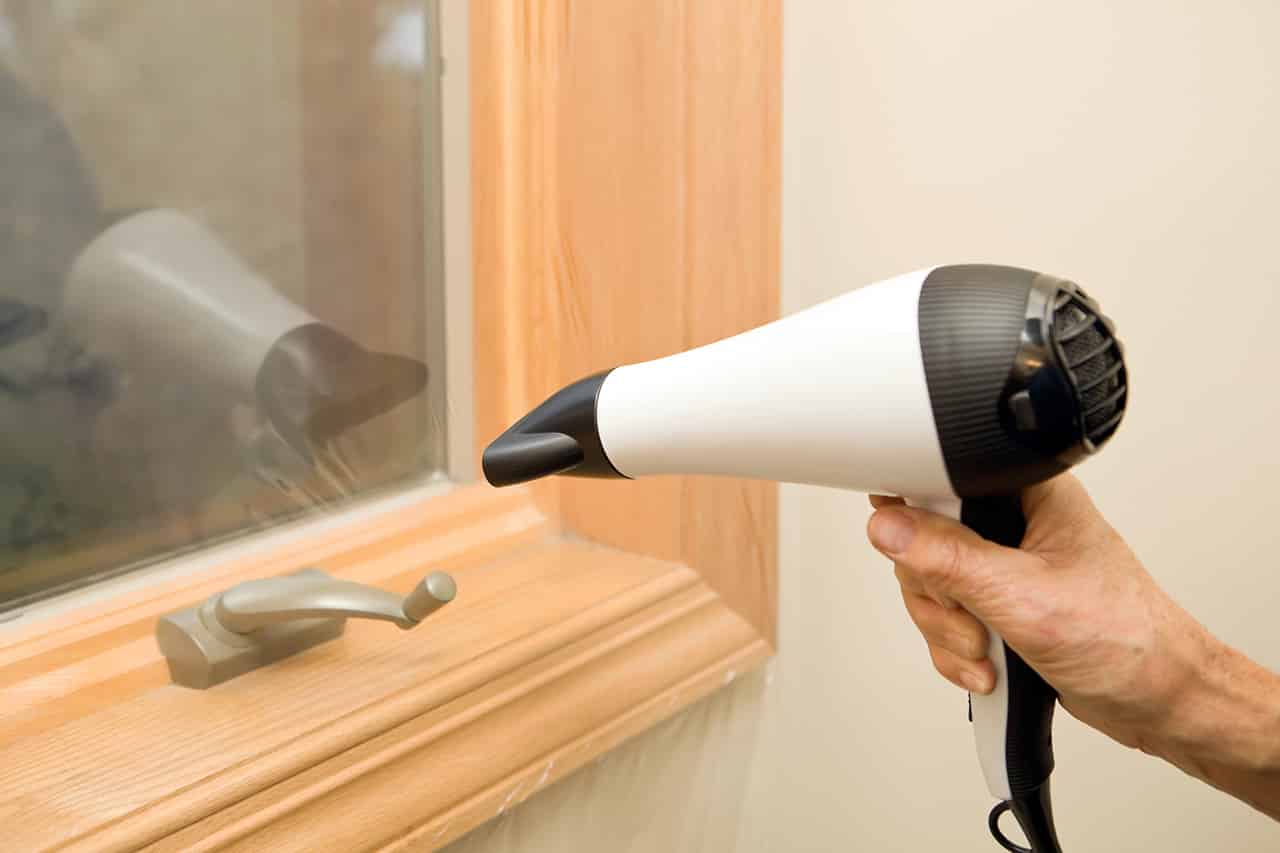
- Use a hairdryer to smooth wrinkles and shrink the film. To achieve a crystal-clear appearance, hold the hairdryer a few inches away from the plastic and work in a pattern over large areas to evenly remove wrinkles.
Here’s a helpful video from 3M that explains the process:
Things to Keep In Mind
If you are installing your application kit to avoid air leaks in the winter months, you should apply the window insulation film in mid to late fall, before it gets too cold. That way, you won’t be dealing with as much moisture on the windows during the application process.
Another thing to consider is that this type of window insulation treatment is seasonal. Films are usually applied before the beginning of the cold season and removed and replaced each year. You can reuse some types of window insulation films. Window insulation kits with thicker, heavy-duty films are usually easier to remove and reuse.
If you find a film isn’t getting the job done, you may want to consider replacing your window for a few hundred dollars. This will ensure your heating and cooling costs don’t fluctuate too much from season to season and will save you the hassle of having to apply and reapply window films. If you’re interested in seeing how much a window replacement would cost, click below.
FAQ: Best Window Insulation Kit
A window insulation kit is an at-home, DIY method of reducing energy loss from inefficient windows. With a window insulation kit, homeowners can create a seal between the indoors and outdoors by shrink-wrapping plastic sheeting onto their windows.
Window insulation kits typically have an easy installation process. Once you have selected your kit and prepped your windows, apply the double-sided tape to the window frame. Next, carefully unfold your film and cover the window. Finally, trim the excess and use a hairdryer to remove wrinkles and improve clarity.
Window insulation kits can save money by reducing heat loss in the winter and cooling loss in the summer. If your windows are better insulated, you will save money through being able to run your heating system and air conditioner less frequently.
Other things you can do to help insulate your home include weather stripping and caulking doors and windows, or adding foam insulation to your garage door. These are quick, DIY ways to prevent energy loss. Spray foam insulation is also a good option, but it may require professional help.

 233k
233k  41k
41k  Subscribe
